Imagine cutting into a dessert that stops conversations and captures everyone’s attention. The red velvet cheesecake cake does exactly that. It’s a stunning mix of two beloved classics that turns any moment into something special.
This masterpiece combines the rich, velvety texture of red velvet cake with the creamy decadence of classic cheesecake. Each slice is a symphony of taste and visual drama. It makes celebrations truly memorable.
The red velvet cheesecake cake isn’t just a dessert. It’s a culinary artwork that speaks to your love of sophisticated, show-stopping treats. Whether you’re marking a special occasion or simply craving something extraordinary, this dessert delivers pure deliciousness.
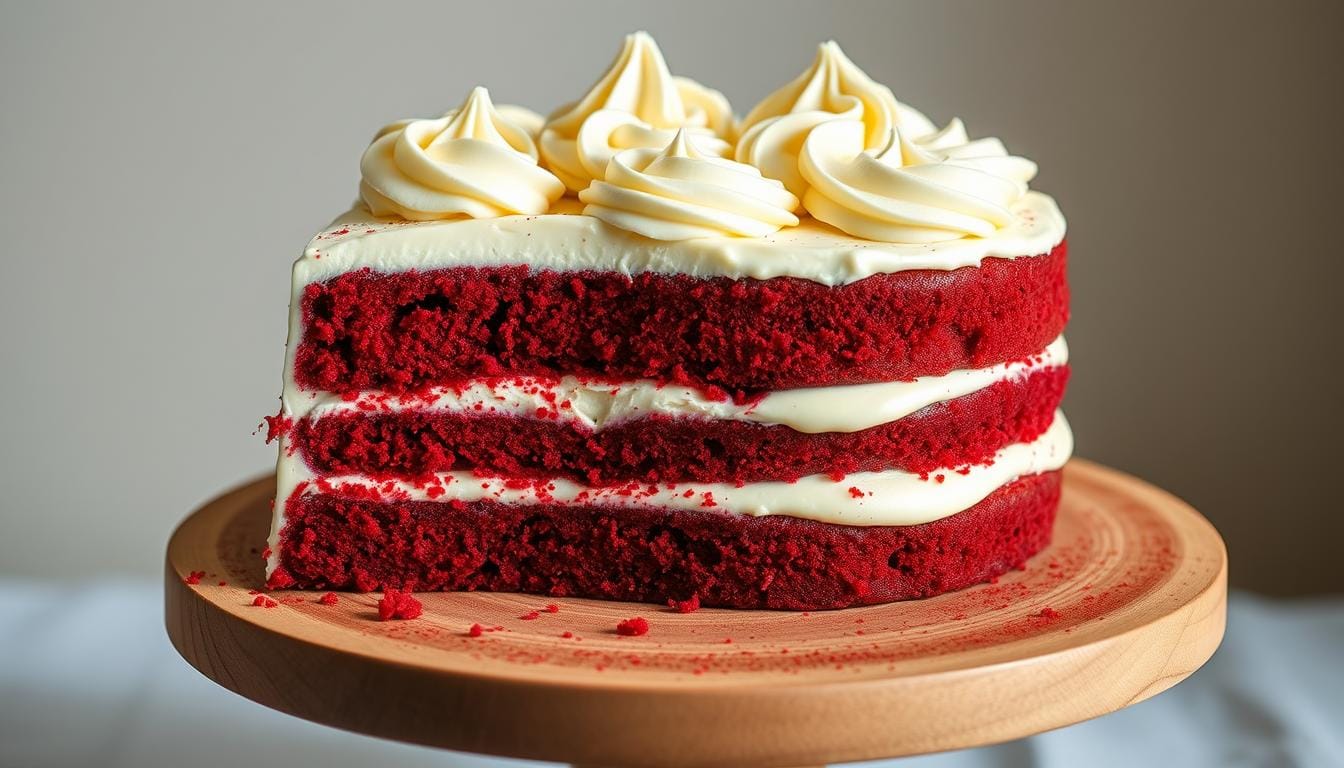
From its vibrant crimson layers to the smooth cream cheese filling, this cake represents the pinnacle of baking creativity. Get ready to explore a dessert that will become your new obsession.
Introduction to Red Velvet Cheesecake Cake
Red velvet cheesecake cake is a mix of southern flavors and new dessert ideas. It has won hearts in the U.S. with its rich history and special taste. From its start to now, red velvet has changed how we enjoy sweet treats.

History of Red Velvet Creation
The story of red velvet cake starts in the early 1900s, in the south. It began with recipes that used cocoa, dating back to the Victorian era. By the 1920s, newspapers showed early versions like red regal and red feather cake. This was the start of a dessert that would become very popular.
- Earliest velvet cakes date back to Victorian times
- First “velvet cocoa cake” recipe appeared in 1911
- Popularity surged after the 1989 film “Steel Magnolias”
Modern Interpretations
Red velvet has seen big changes over time. During World War II, beet juice was used to make the cake red because of food shortages. The Waldorf Astoria hotel served an early version in the mid-1920s. This helped make the dessert famous across the U.S.
| Decade | Key Development |
|---|---|
| 1940s | Adams cake kit introduced with food coloring |
| 1970s | Temporary decline in popularity |
| 2000s | Revival and upscale bakery staple |
Signature Characteristics
Red velvet is known for its unique taste and look. It has a soft texture, a deep red color, and a hint of cocoa. The mix of buttermilk, vinegar, and cocoa makes it special. Today, red velvet cheesecake cake is loved for its history and delicious taste.
Essential Ingredients for Perfect Results
To make a stunning Red Velvet Cheesecake Cake, you need the right ingredients. These ingredients work together to create a dessert that’s truly special. Knowing what makes this cake stand out is key to success.

The magic starts with top-notch cocoa powder. It gives the cake its unique chocolate flavor. Dutch-processed cocoa powder is the best choice for a deep red color and rich taste.
Key Ingredients Breakdown
- Buttermilk: Creates a tender, moist crumb
- Cocoa powder: Delivers rich chocolate notes
- Cream cheese frosting: Adds tangy, smooth finishing touch
- All-purpose flour: Provides structural integrity
- Red food coloring: Gives signature vibrant color
Buttermilk is crucial for the cake’s texture. It makes the cake light and fluffy. When mixed with cocoa powder, it adds a special flavor that makes red velvet unique.
| Ingredient | Quantity | Purpose |
|---|---|---|
| Cocoa Powder | 2 ½ tablespoons | Flavor enhancement |
| Buttermilk | 1 ⅓ cups | Moisture and tenderness |
| Cream Cheese Frosting | 20 oz | Creamy topping |
The cream cheese frosting is the cake’s crowning glory. It brings the cake layers together with its creamy, tangy taste. Make sure all ingredients are at room temperature for the best results.
Equipment and Tools Needed
To make the perfect Red Velvet Cheesecake Cake, you need the right tools. These tools will help you get professional-quality results. Knowing what tools to use can make baking easier and more successful.
Baking Pans and Sizes
Choosing the right baking pans is key for your Red Velvet Cheesecake Cake. You’ll need:
- One 9-inch springform pan for the cheesecake layer
- Two 9-inch round cake pans for red velvet layers
- Parchment paper for easy cake removal
Mixing Equipment
Good mixing is crucial in baking. Invest in quality tools like:
- Stand mixer or electric hand mixer
- Large mixing bowls
- Rubber spatulas
- Whisk
Temperature Tools
Getting the temperature right is important for a perfect cheesecake. Useful tools include:
| Tool | Purpose |
|---|---|
| Oven Thermometer | Verify accurate oven temperature |
| Instant-Read Thermometer | Check internal cake temperature |
| Digital Kitchen Scale | Ensure precise ingredient measurements |
With the right equipment, your baking will go from home cooking to professional-level desserts.
Preparing the Red Velvet Cake Layers
Making the perfect red velvet cake layers is key to your red velvet cheesecake cake. These layers are the base of your dessert. They need careful prep to get that bright color and soft texture.
- 2 1/2 cups all-purpose flour
- 2 tablespoons cocoa powder
- 1 teaspoon baking soda
- 1/2 teaspoon salt
- 1/2 cup buttermilk
- 1 tablespoon white vinegar
- 1 teaspoon vanilla extract
- 1 3/4 cups granulated sugar
- 3/4 cup vegetable oil
- 2 large eggs
- 2 teaspoons red gel food coloring
To make the best red velvet cake layers, follow these steps:
- Preheat your oven to 350°F (175°C)
- Sift dry ingredients together for smooth mixing
- Mix wet ingredients separately, including food coloring
- Combine wet and dry ingredients gently
- Divide batter evenly between two 9-inch cake pans
| Baking Detail | Specification |
|---|---|
| Baking Temperature | 350°F (175°C) |
| Baking Time | 30-35 minutes |
| Cooling Time in Pans | 10 minutes |
| Total Cooling Time | 20-30 minutes |
Check cake doneness with a toothpick. It should come out clean and be a vibrant red. Let them cool fully before you put your red velvet cheesecake cake together.
Mastering the Cheesecake Layer
Making the perfect cheesecake is an art. It turns simple dessert ideas into something truly special. The secret is in the details and the technique.
Temperature Control Techniques
Getting the cheesecake just right means watching the temperature closely. Begin with ingredients at room temperature for a smooth mix. Then, bake at 325°F for a creamy, evenly baked treat.
- Use room temperature cream cheese
- Bake at consistent 325°F
- Aim for 60-70 minutes of baking time
Texture Perfection Strategies
The cheesecake’s texture comes from mixing right and using the right ingredients. Mix 16 ounces of cream cheese with 4 eggs for a rich filling. A water bath prevents cracks and ensures even baking.
| Ingredient | Quantity |
|---|---|
| Cream Cheese | 16 ounces |
| Granulated Sugar | 1-1/2 cups |
| Eggs | 4 large eggs |
Troubleshooting Common Cheesecake Challenges
Fix common problems with these tips. Cracks often come from mixing too much or sudden temperature changes. Chill your cheesecake for at least 4 hours, or better yet, overnight, for a perfect set.
- Avoid overmixing the batter
- Use a water bath to prevent cracking
- Refrigerate for minimum 4 hours
Pro tip: Your cheesecake can stay in the fridge for up to 4 days or be frozen for 2 months. It’s perfect for any time you want a special dessert.
Creating the Perfect Cream Cheese Frosting
Making the ultimate cream cheese frosting turns your Red Velvet Cheesecake Cake into a must-have dessert. It’s all about the right mix of sweet and tangy. This creamy topping needs quality ingredients and careful mixing to get it just right.
Start with the essential ingredients for a smooth frosting. Here’s what you’ll need:
- 8 ounces cream cheese (room temperature)
- ½ cup unsalted butter (softened)
- 3 cups powdered sugar
- 1 teaspoon vanilla extract
The key to a luxurious frosting is using room temperature cream cheese and butter. This avoids lumps and gives a silky feel.
| Ingredient | Quantity | Purpose |
|---|---|---|
| Cream Cheese | 8 oz | Provides creamy base |
| Butter | ½ cup | Adds richness |
| Powdered Sugar | 3 cups | Sweetens and stabilizes |
| Vanilla Extract | 1 tsp | Enhances flavor |
For the best frosting, mix ingredients slowly and don’t overbeat. This keeps it smooth and flavorful.
- Mix cream cheese and butter until smooth
- Gradually add powdered sugar
- Beat until light and fluffy
- Add vanilla for depth of flavor
It’s important to store your frosting well. Keep it in the fridge for up to 3 days or freeze for a month. Let it come to room temperature before using for easy spreading.
Assembly Techniques and Tips
Making the perfect red velvet cheesecake cake needs precision and skill. These professional assembly methods turn individual parts into a stunning masterpiece.
Assembling your red velvet cheesecake cake is all about a few key steps. It’s about keeping it sturdy while making it look great.
Layer Stacking Method
Here’s how to layer perfectly:
- Start with a completely cooled red velvet cake layer
- Place the first layer on a sturdy cake board
- Chill the cheesecake layer before transferring
- Center the chilled cheesecake precisely on the first cake layer
- Gently place the second red velvet cake layer on top
Frosting Application Techniques
Getting a smooth cream cheese frosting finish takes patience and the right method:
- Apply a thin crumb coat first
- Refrigerate for 1 hour to set the initial layer
- Use an offset spatula for even frosting distribution
- Rotate the cake stand while frosting for consistent coverage
Decorative Finishes
Enhance your dessert with these decorative touches:
- Create elegant swirls using a piping bag
- Sprinkle cocoa powder or red velvet crumbs around the base
- Add chocolate shavings for sophisticated garnish
- Use fresh berries for a pop of color
Your red velvet cheesecake cake will be a stunning centerpiece. It will impress everyone with its looks and taste.
Storage and Serving Guidelines
Keeping your Red Velvet Cheesecake Cake fresh is key. It’s a standout holiday treat that needs special care. This ensures its taste and texture stay top-notch.
Refrigeration is essential for freshness. Place the cake in an airtight container in the fridge. It will stay delicious for up to 5 days. Before serving, let it sit at room temperature for 30 minutes to bring out the flavors.
- Refrigerate within 2 hours of preparation
- Use an airtight container to prevent moisture loss
- Allow cake to reach room temperature before serving
When serving, presentation is important. Here are some tips for a fancy look:
- Cut clean slices using a warm, sharp knife
- Garnish with fresh berries or a light dusting of cocoa powder
- Serve on chilled dessert plates for an extra touch of sophistication
For longer storage, freeze individual slices or the whole cake. Wrapped well, it can be frozen for up to 2 months. Thaw overnight in the fridge for the best taste when you’re ready to enjoy it.
Nutritional Information and Dietary Considerations
Enjoying desserts like the Red Velvet Cheesecake Cake means knowing its nutritional facts. This sweet treat has certain dietary points to consider for all dessert fans.
Caloric Content Breakdown
A slice of Red Velvet Cheesecake has 400-600 calories. Its rich ingredients make it high in calories. How much you eat affects your calorie intake.
- Cake layers: About 200-250 calories
- Cheesecake layer: Around 250-300 calories
- Cream cheese frosting: 100-150 calories
Allergen Information
For those with dietary limits, knowing allergens is key. This dessert has several common allergens:
- Milk products
- Wheat
- Eggs
- Soy
Portion Control Strategies
To enjoy this dessert wisely, try these tips:
- Cut smaller slices (2-3 inches)
- Share with friends or family
- Pair with a light meal
- Enjoy as an occasional treat
By eating mindfully, you can enjoy these flavors while keeping your diet balanced.
Variations and Creative Twists
Turn your classic red velvet cheesecake cake into exciting new desserts. This beloved southern cuisine favorite can be transformed for holiday treats and special occasions. Your creativity can make this traditional treat extraordinary.
Exciting Flavor Adaptations
Here are some delightful variations to inspire your baking:
- Red Velvet Cheesecake Cupcakes: Perfect for individual servings
- Holiday Peppermint Red Velvet Cheesecake: Festive winter twist
- Summer Berry Red Velvet Trifle: Fresh seasonal adaptation
- Keto-Friendly Red Velvet Cheesecake: Health-conscious option
Regional Flavor Inspirations
Different regions offer unique takes on this classic dessert. Southern cuisine celebrates creativity. It encourages bakers to experiment with local ingredients and personal touches.
| Variation | Unique Feature | Popularity |
|---|---|---|
| Red Velvet Brownie Cheesecake | Fudgy chocolate layers | 90% Consumer Satisfaction |
| Red Velvet Cheesecake Jar Dessert | Portable individual serving | 80% Event Preference |
| No-Bake Red Velvet Cheesecake | Easy preparation method | 75% Home Baker Adoption |
Your red velvet cheesecake can become a canvas for culinary expression. Whether for a holiday gathering or a casual weekend treat, these variations offer something for every taste and occasion.
Professional Food Photography Tips
Capturing stunning food photography for your Red Velvet Cheesecake Cake needs more than just basic skills. Natural light is your best friend. Place your cake near a large window for soft, diffused daylight. This will highlight its rich red color and creamy layers.
Styling is key in food photography. Choose props that match the cake’s deep red color. Think white ceramic plates, vintage silver forks, or marble surfaces. Try different angles to show the cake’s layers and velvety texture. Get close-up shots to reveal the cream cheese frosting and the cake’s luxurious interior.
Remember, composition is crucial in food photography. Use the rule of thirds for visually appealing images. Place the cake slightly off-center for a better view. A dark background can make the cake’s vibrant color stand out. Basic photo editing tools can also enhance your image.
Professional food photographers practice a lot. Don’t be afraid to try different lighting, backgrounds, and styling. Your goal is to create an image that looks delicious and tells a story about your Red Velvet Cheesecake Cake’s rich texture and charm.